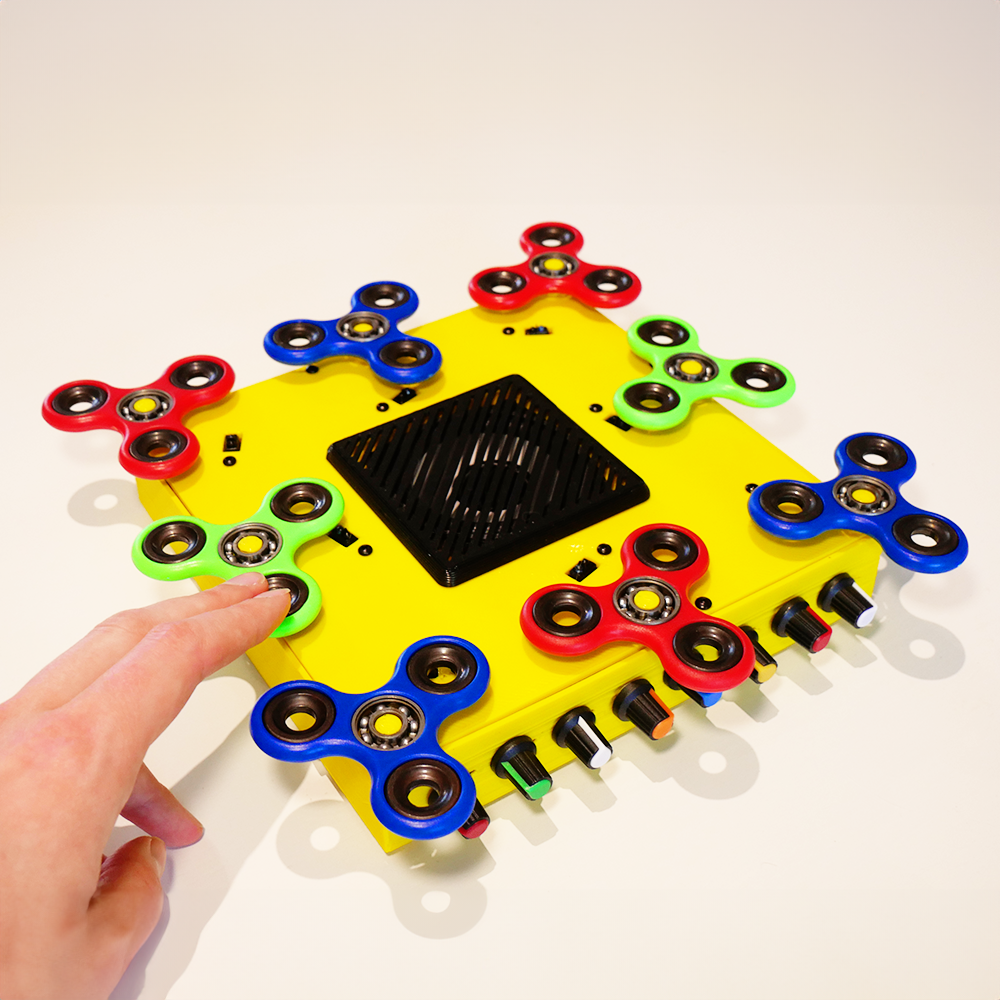
Sound sources: SINE, TRIANGLE, SAW, SQUARE, BAMBOO sample Built-in effects: Filter, Warp, Tremolo, Glitch Includes full source code so you can modify it yourself.
Connectivity: headphone output, built-in speaker with amplifier, works with a power bank.
Important to know
Limited edition: only 5 units ever built, each one signed by me.
This is not a polished product, but an experimental art piece.
The IR sensors are disrupted by infrared and sunlight. Normal daylight usually works fine, but on sunny days (even indoors) the instrument will not function properly.
The amplifier crackles and the volume knob can only be opened partway – otherwise the synth restarts.
General Disclaimer
All items sold through Strange Inventions Lab are hand-built experimental creations. They are sold as-is, without certification, warranty, or guarantee of safety for long-term or unsupervised use.
Not intended for children.
Use only under supervision.
May contain repurposed or off-the-shelf components.
Risk of overheating, malfunction, or damage if misused.
By purchasing, you accept that these products are art pieces / prototypes, not mass-produced consumer electronics.
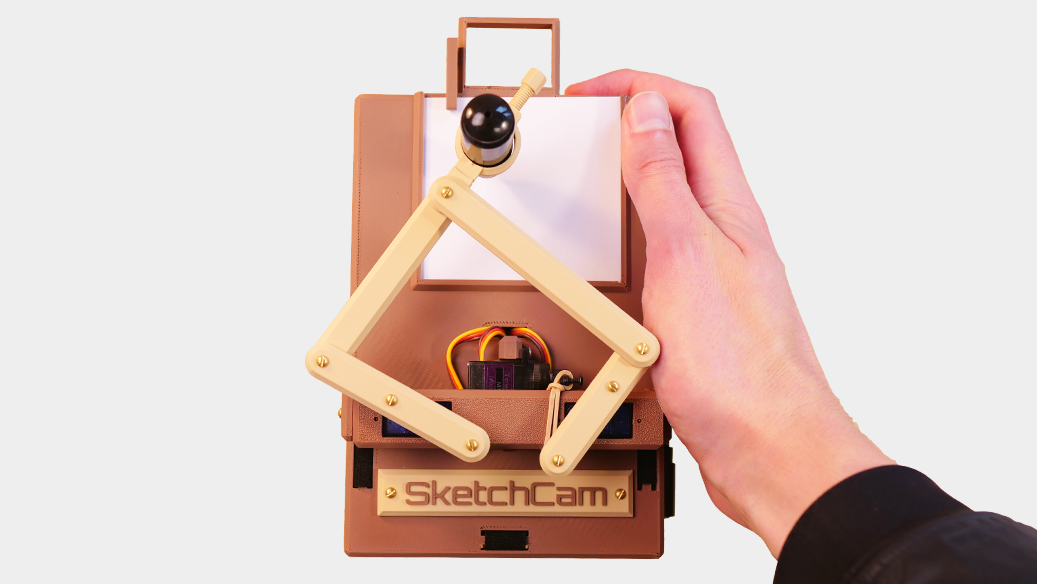
SketchCam Files Only – Build your own instant sketch camera
The SketchCam Files Only lets you build a camera that takes a picture and turns it into a physical line drawing within minutes. Powered by a Raspberry Pi and simple servos, it’s a hybrid of photography, robotics, and art.
What’s inside
Bill Of Materials (BOM) – Total price will be around $60. BOM is specified below!
3D printable STL files
Full source code
Assembly guide video (linked at bottom of this page!)
Access to the Discord Server (request access here: https://discord.gg/85z87eR9wz)
What you’ll need
3D printer
Parts from the Bill Of Materials below
Knowledge of how to flash an SD card with an image
Basic maker tools (long small philips screwdriver & soldering iron)
Compatible power bank (5V, 4.5A, but lower should probably work too. I use the Iniu B61)
Pen (fine liner or low friction ball point) and paper
How it works
The camera captures a photo.
The onboard processor converts it into clean vector lines.
The servos trace those lines on paper, stroke by stroke.
The result? A unique hand-drawn sketch of your scene, made by a machine you built yourself.
For who
Perfect for hobbyists, educators, and anyone who enjoys combining code, motion, and creativity. Whether you want a weekend build or a new showpiece for your maker desk, the SketchCam Kit is an experience that turns pixels into pen lines.
Build time: 5-6 hours Drawing time: ~3 minutes per sketch
Bill of Materials (hey Bill!)
Bill of Materials (hey Bill!)
Raspberry Pi Zero W €18 (I took the one with presoldered headers)
3D printed parts: € 5,- (from your download!)
Camera: €5 (Raspberry Pi AF Camera 5MP OV5647 Auto Focus 65° 15Pin Interface Camera Module for RPi 5 4B 3B+ 3B Zero 2 W, https://nl.aliexpress.com/item/1005005928324800.html)
Camera flex cable standard to mini 15-20cm: €1 (https://nl.aliexpress.com/item/1005005928324800.html)
PWM driver PCA9685: €3 (PCA9685 16 Channel 12-bit PWM/Servo Driver-I2C interface PCA9685 module Raspberry pi shield module servo shield https://nl.aliexpress.com/item/1005004959076770.html)
2x M2*8-10mm screw wider head (5mm head) for pen holder -> L2 and up/down servo -> rubber band
4x M2*12mm screw small head (3.5 mm head) for back box
9x M2*6mm screw small head (3.5 mm head) for servo driver and Raspberry Pi boards and button holder
4x M2*8mm screw small head (3.5mm head) for camera board
9x brass M2*8 screw for linkages and logo plate
Small rubber band (for up/down servo -> servo bracket linkage)
7x Dupont wire Female – Female 20cm: €1 (get yourself high quality ones if you can find them)
Push button: €1 (https://www.aliexpress.com/item/1005006687000578.html, the one I used has a base which is 12x12mm and 3mm thick. The actual pushable part is sticking out 1.8mm upwards)
Small USB cable: €2 (micro USB 90 degrees <-> USB A 90 degrees 15 cm https://www.amazon.nl/HOTNOW-micro-USB-kabel-gevlochten-high-speed-snellaadkabel/dp/B0FHW488TG)
Velcro straps: €1 (15mm wide, 35cm and 25cm long, total 0.6m Rocoren Cable Organizer Wire Winder USB Cable Management Charger Protector For Phone Mouse Earphone Cable Holder Cord Protection https://nl.aliexpress.com/item/1005005392210702.html)
3x original SG92R servo: €20 (Original MG90S works too, original SG90 should work, though I’m not 100% sure)
Micro SD card for Raspberry Pi (>16 GB, take a decent brand): €4
Update June 2026: All sold out! Send me a message if you want to join the wait list.
SketchCam Maker Kit – Build your own instant sketch camera
The SketchCam Maker Kit lets you build a camera that takes a picture and turns it into a physical line drawing within minutes. Powered by a Raspberry Pi and simple servos, it’s a hybrid of photography, robotics, and art.
What’s inside
All essential electronic components
3D printed parts (STL files included)
Full source code and assembly guide video
Flexible mounting straps and wiring
Raspberry Pi, Micro SD card, Camera module, PWM driver, and USB power cable
What you’ll need
Basic maker tools (long small philips screwdriver & soldering iron)
Compatible powerbank (5V, 4.5A, but lower should probably work too. I use the Iniu B61)
Pen (fine liner or low friction ball point) and paper
How it works
The camera captures a photo.
The onboard processor converts it into clean vector lines.
The servos trace those lines on paper, stroke by stroke.
The result? A unique hand-drawn sketch of your scene, made by a machine you built yourself.
For who
Perfect for hobbyists, educators, and anyone who enjoys combining code, motion, and creativity. Whether you want a weekend build or a new showpiece for your maker desk, the SketchCam Kit is an experience that turns pixels into pen lines.
Build time: 2–3 hours Drawing time: ~3 minutes per sketch
Join the Discord server: https://discord.gg/85z87eR9wz